


IronSource iOS SDK Mediation
Tappx as Custom Network
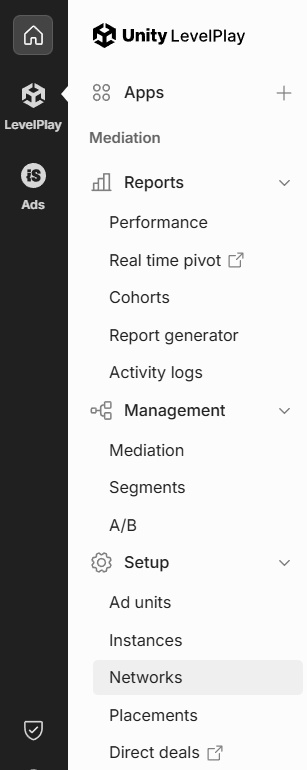
To add Tappx as a new Ad Network in your IronSource Dashboard, go to the side panel in the "LevelPlay" section, navigate to the "Setup" submenu, and select "Networks".
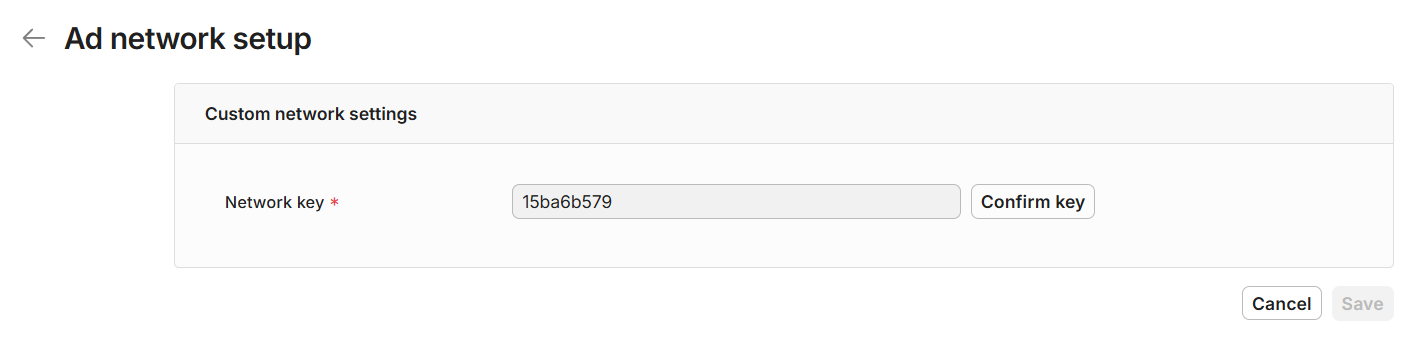
Next, you need to select the option at the bottom called "Custom Adapter" and fill in the "Network Key" field with the following ID: 15ba6b579
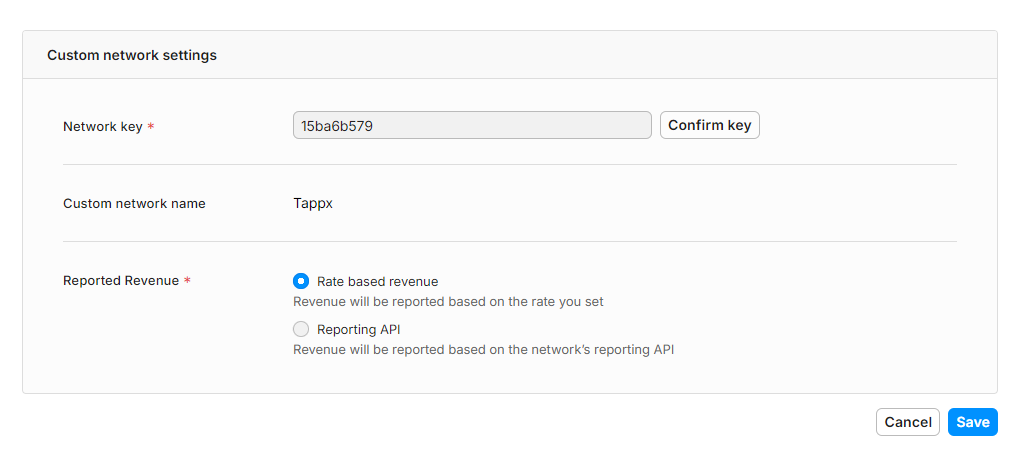
You need to add a unique name for this new network on the “Custom network name” field, and also you must select the “Rate based revenue” option of the “Reported Revenue” checker in order to finish the initial setup.
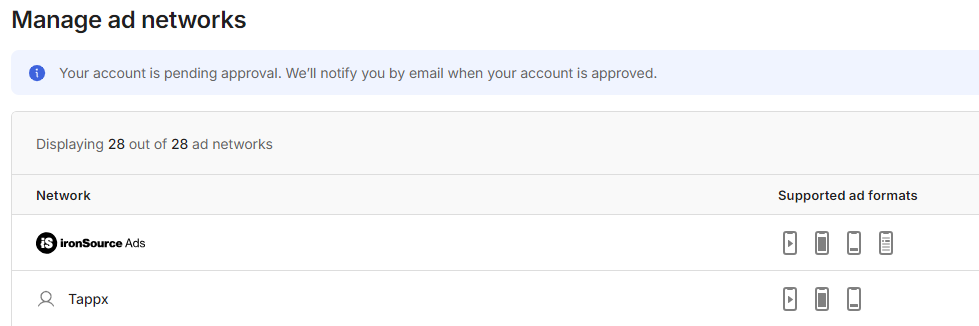
This new Custom Network will likely be pending approval, as it is an internal process within IronSource, that may take a few hours.
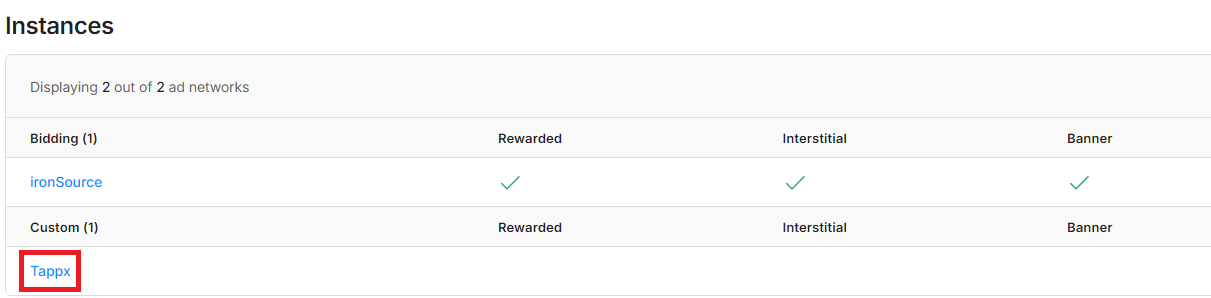
Once approved, you will be able to check the Instances page under the Setup submenu. Here you will find all the active networks, including Tappx. Click on it to properly configure the different ad units.
Now, you can click the “+ Add Instance” button to create a new instance. During this process, you will need to fill in the following fields:
- Instance name: the unique name that you want to assign to this instance.
- endpoint: a unique identifier for each publisher, provided by Tappx.
- tappxkey: a unique identifier for each ad unit, provided by Tappx.
- test: this field allows you to receive test ads when set to “1”. These ads will not be monetized. It’s recommended for the testing phase.
- Mediation groups: this field will allow you to select the different mediation groups that have already been created.
- Rate: the CPM established for this instance. This value directly impacts the network’s position in the waterfall.
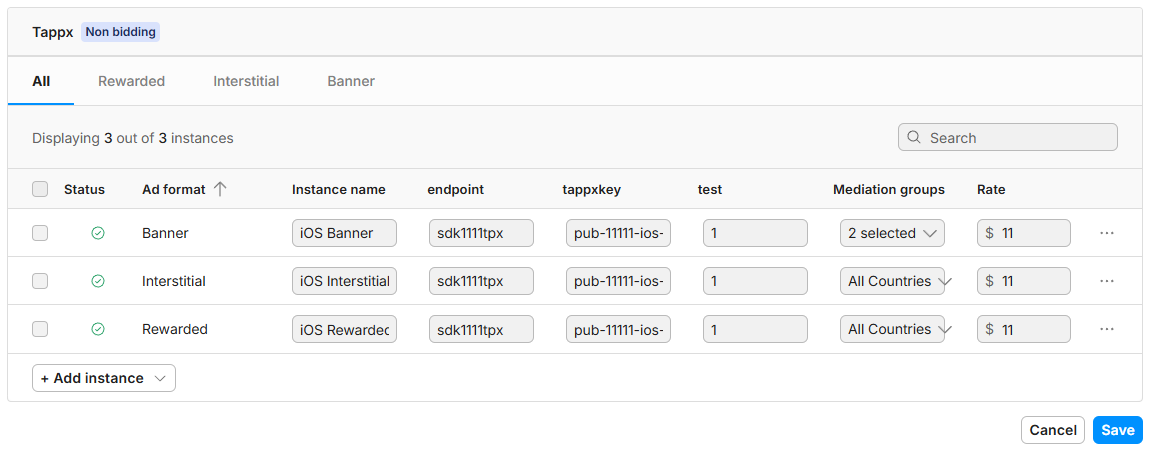
Finally, you just need to click the "Save" button, and the Tappx Custom Network will be integrated.