


IronSource Android SDK Mediation
Tappx as Custom Network
To add Tappx as your new Ad Network in your IronSource Panel, you must access the "SDK Networks" section and click on "Manage Networks":
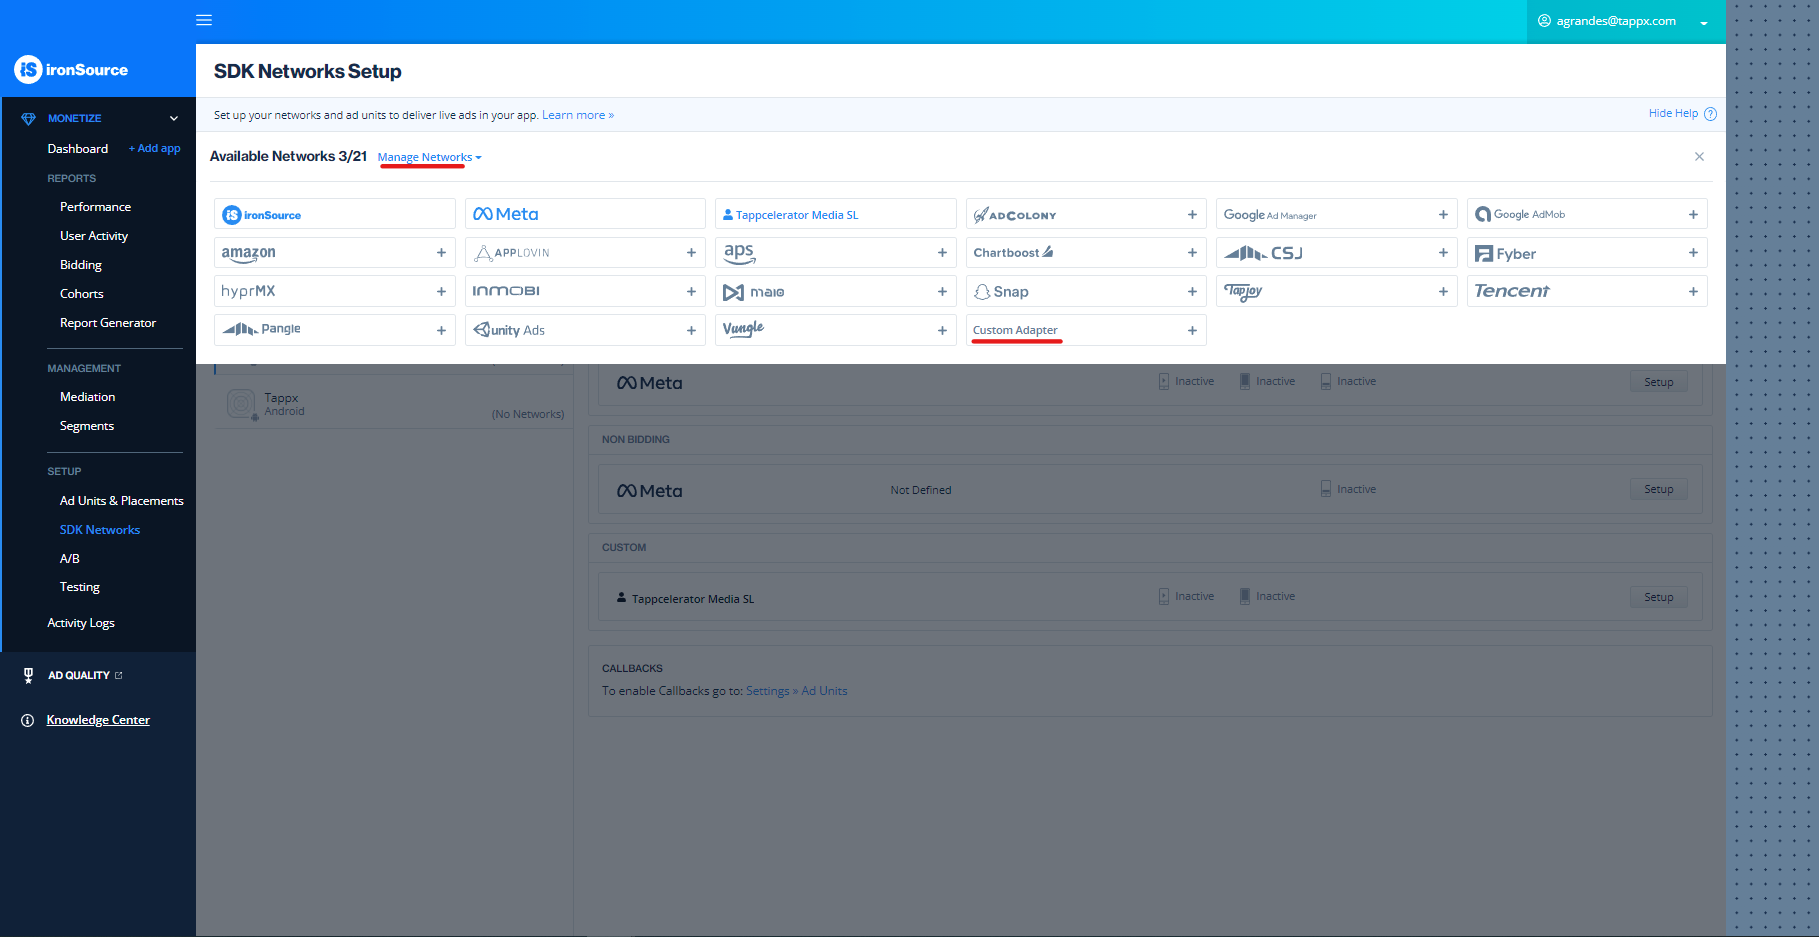
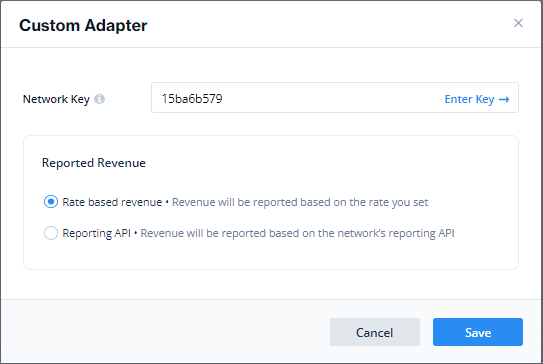
Next, you must select the last item in the "Custom Adapter" list and fill in the fields with the following information:
- Network Key: 15ba6b579
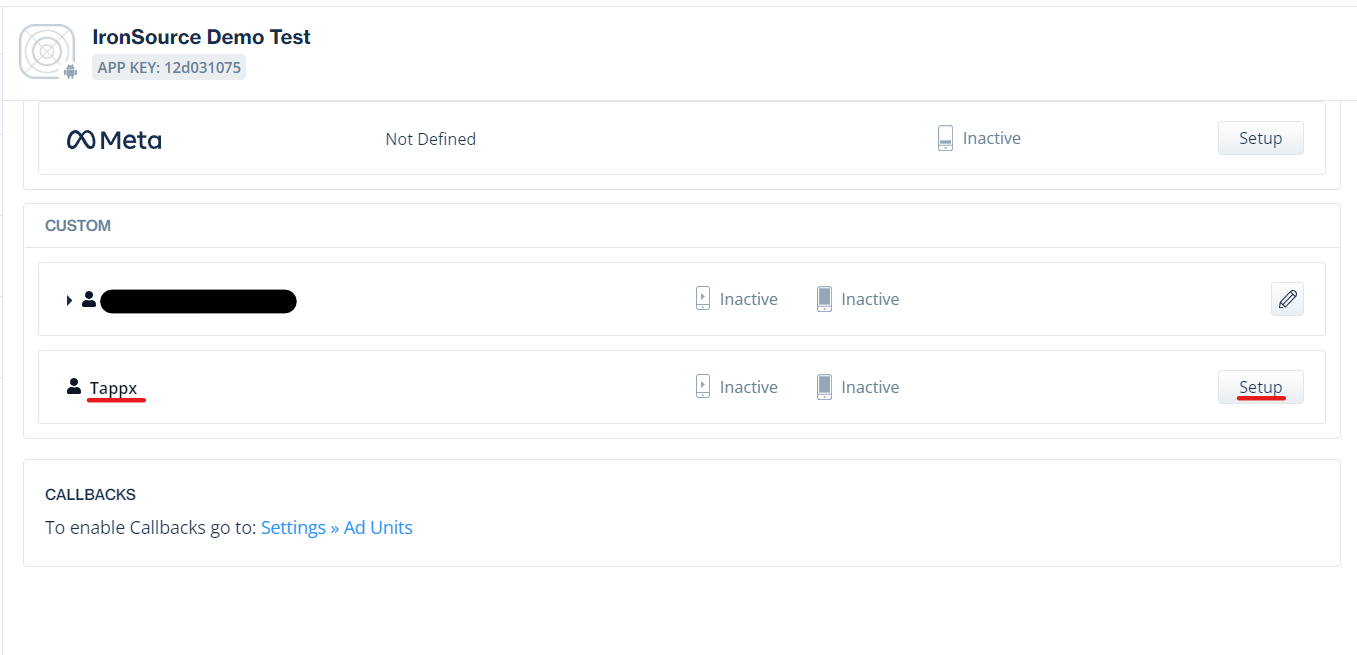
Finally, you can now add Tappx as one more network for your applications. To do this, you must go to the "Custom" network configuration for that application and click the "Setup" button.
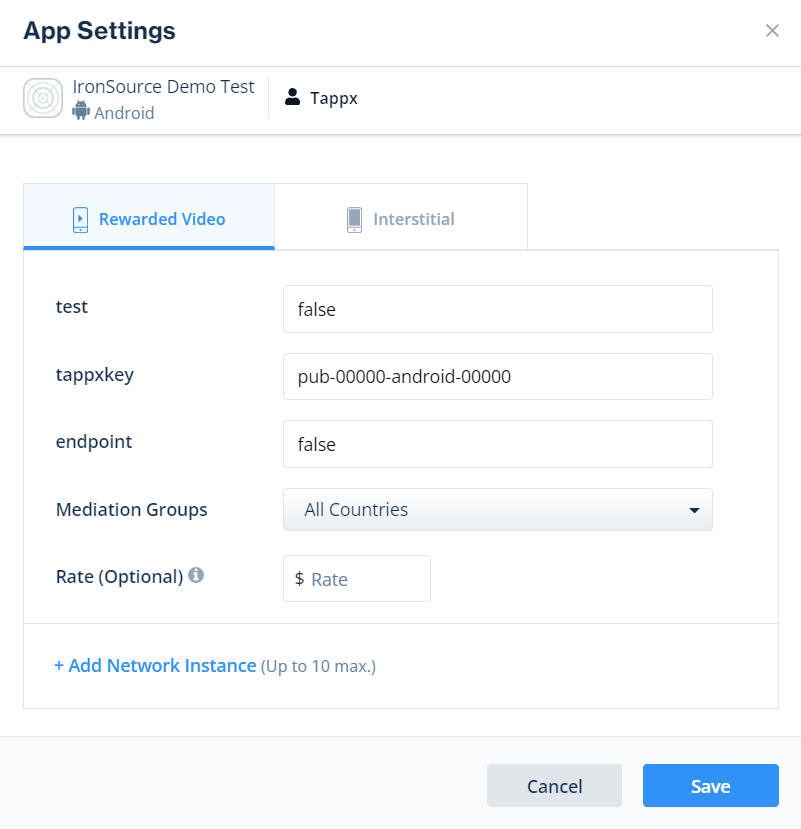
Now you will enter the configuration section of your placement IDs. For each placement ID on your site you can create a different tappxkey in our system. You can also use the same tappxkey for all placements and formatting types. It all depends on whether you want to be able to distinguish the requests for each space in your application or you prefer to see them grouped.
The fields that you must fill in are the following:
- test: This is a value that indicates if you want to receive test ads from Tappx (only for testing, it does not monetize). If so, you must put "true", otherwise put "false".
- tappxkey: This is the most important value and refers to the tappxkey created in the dashboard. It is the one that will allow you to identify yourself when making ad requests. Example, pub-00000-android-00000
- endpoint: It is a feature for publishers with custom options. Always leave it as "false".
And that is all.